Building a deck can significantly enhance your outdoor living space, providing a perfect area for entertaining, relaxing, or enjoying the beauty of your backyard. Whether you are a DIY enthusiast or a beginner, constructing a deck is a manageable project if you follow the correct steps. This guide will walk you through the process of building a durable and aesthetically pleasing deck for your home.
Step 1: Plan Your Deck Design
Before picking up any tools, it is crucial to plan your deck thoroughly. Consider the purpose of your deck, whether it is for dining, lounging, or adding visual appeal to your backyard. Think about the size, shape, and location of your deck. Also, ensure your design complies with local building codes and obtain any necessary permits. Sketching a layout or using a deck design software can help visualize your project before beginning.
Another important consideration is material selection. Pressure-treated lumber, composite decking, and hardwood are popular choices. Each material has its pros and cons, so choose one that suits your budget and maintenance preference. If unsure, consulting a professional deck builder can help clarify your options and ensure a successful project.
Step 2: Gather Tools and Materials
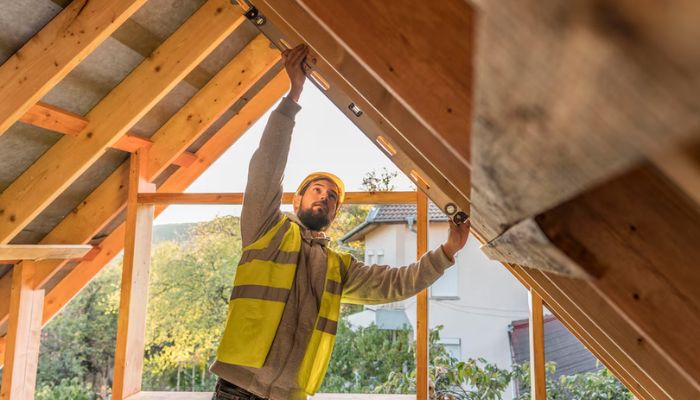
Once you have a plan, gather all the required tools and materials. Essential tools for deck building include:
- Measuring tape
- Circular saw
- Power drill
- Level
- Post hole digger
- Shovel
- Safety gear (gloves, goggles, knee pads)
For materials, you will need:
- Deck boards
- Pressure-treated lumber for framing
- Concrete mix for footings
- Galvanized screws and nails
- Joist hangers
- Railings and balusters (if required)
Step 3: Prepare the Site
Clear the area where your deck will be built, removing any grass, plants, or debris. Mark the perimeter using stakes and string to outline the deck’s dimensions. Use a level to ensure the ground is even. If necessary, excavate and fill any uneven areas to create a stable foundation.
Step 4: Install the Footings and Posts
The foundation is crucial to the longevity of your deck. Follow these steps to install footings and posts:
- Dig post holes according to local building code requirements (usually around 12–18 inches deep).
- Pour concrete into the holes and place post anchors before it sets.
- Once the concrete is dry, position the posts into the anchors and secure them with bolts.
- Ensure the posts are level and evenly spaced, as they will support the deck frame.
Step 5: Build the Frame
The frame is the structural backbone of your deck. To build the frame:
- Attach a ledger board to your house if your deck is attached to your home.
- Install beams across the posts, using metal brackets for added support.
- Secure joists perpendicular to the beams with joist hangers.
- Ensure all joists are evenly spaced, typically 16 inches apart, to provide strong support for the deck boards.
- Double-check that the frame is level before proceeding.
Step 6: Lay the Deck Boards
With the frame ready, start laying the deck boards:
- Begin at one end and work your way across, securing each board with screws or nails.
- Leave a small gap (about 1/8 inch) between boards to allow for expansion and drainage.
- Trim any overhanging boards for a clean finish.
- Use a chalk line to ensure the boards are straight.
Step 7: Install Railings and Stairs (If Required)
If your deck is elevated, installing railings and stairs is necessary for safety.
- Attach posts for railings at regular intervals.
- Secure balusters and top rails, ensuring they are evenly spaced.
- For stairs, measure and cut stringers, then attach treads securely.
- Confirm that all railings meet safety codes to prevent accidents.
Step 8: Finishing Touches
Once the main structure is complete, apply finishing touches to enhance durability and aesthetics:
- Sand rough edges to prevent splinters.
- Apply a sealant or stain to protect against weather damage.
- Add outdoor furniture, lighting, or plants to enhance the deck’s appeal.
Step 9: Perform a Final Inspection
Before enjoying your new deck, conduct a thorough inspection:
- Ensure all screws and nails are secure.
- Check for any uneven boards or protruding fasteners.
- Test the stability of railings and stairs.
- Confirm the deck is level and safe for use.
Conclusion
Building a deck is a rewarding project that adds value to your home while creating an inviting outdoor space. By following these step-by-step instructions and ensuring compliance with safety codes, you can successfully complete your home deck build with confidence. Whether for entertaining guests or relaxing with family, a well-constructed deck provides years of enjoyment and enhances your property’s overall appeal.
Recent Comments